Survival Log Stockpile: What to Hoard First & Exact Order (2026)
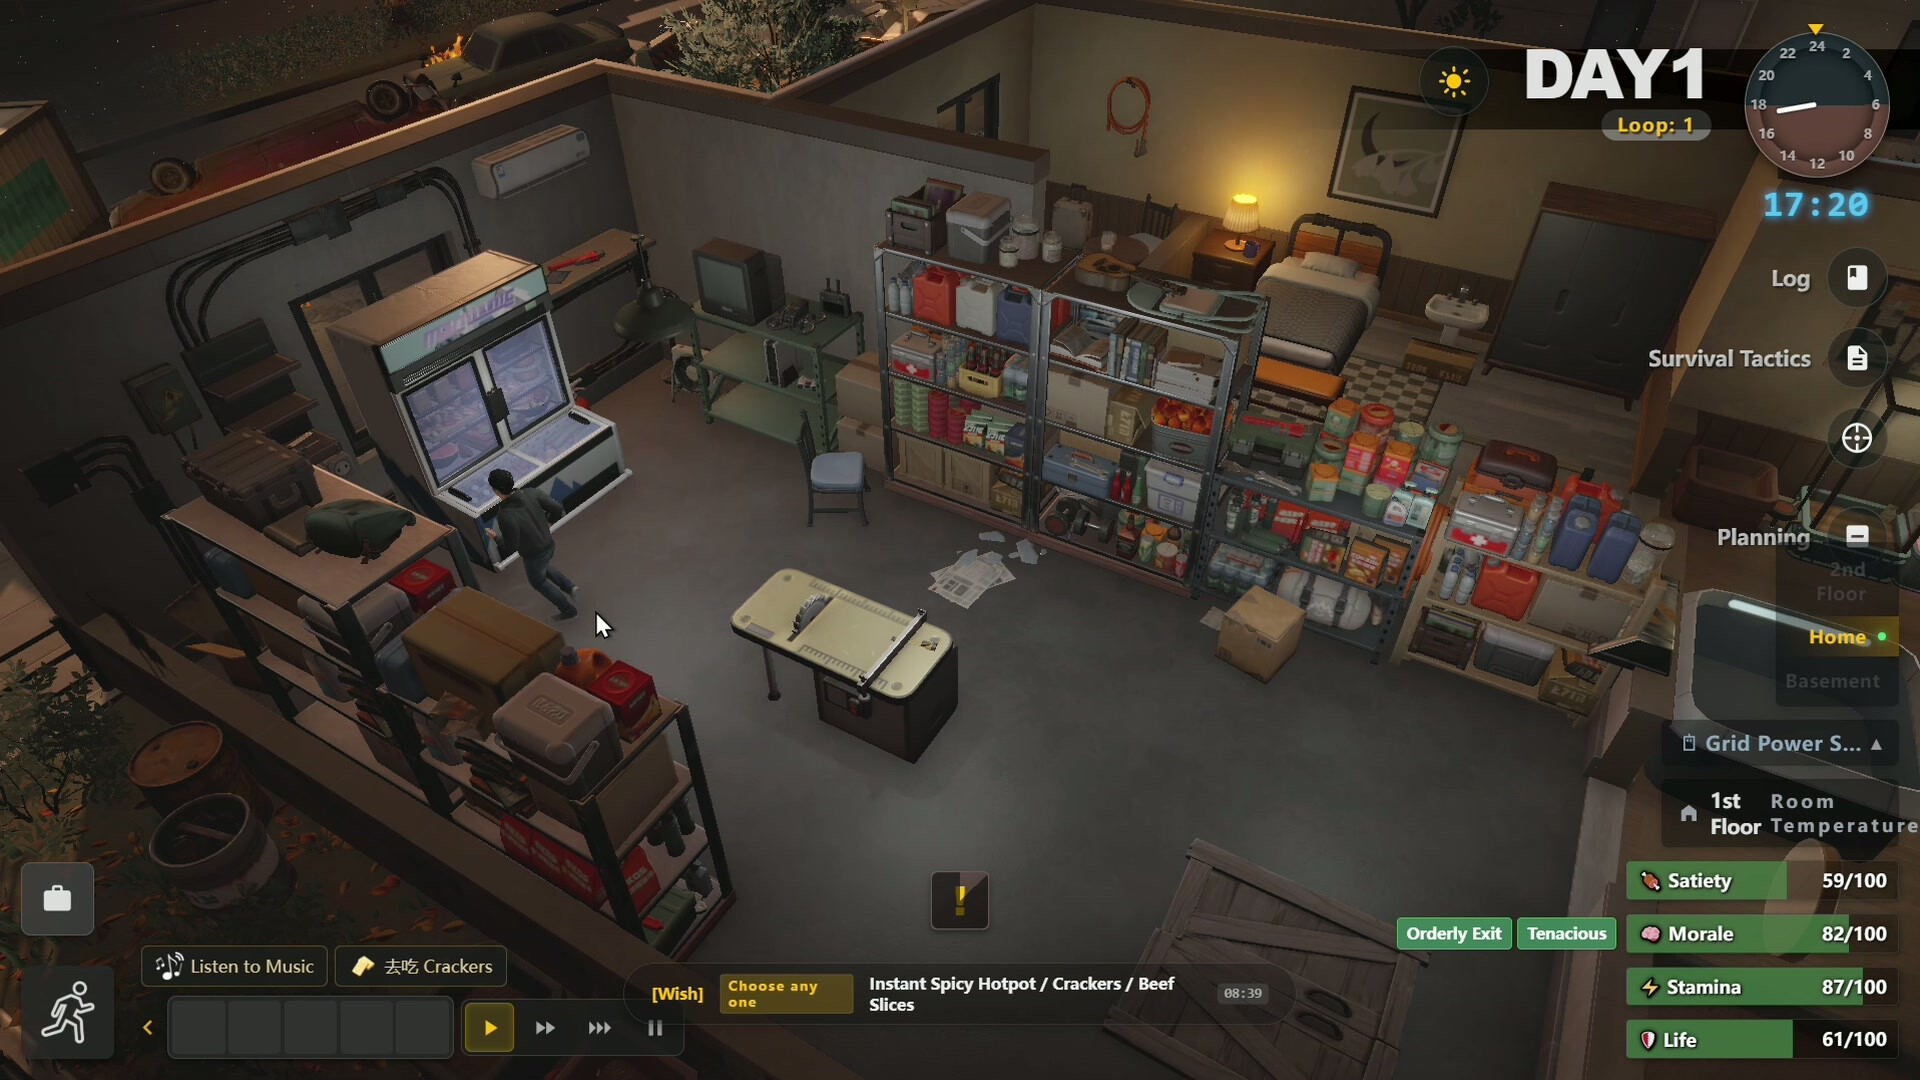
In Survival Log, you must hoard 20+ food types and 4+ material types before the disaster — but order matters more than volume. The verified priority sequence is: food variety → materials → storage furniture → seeds → defense parts. This page shows the exact hoarding order, weight milestones, storage caps, and a day-by-day plan for your first loop and optimized runs. No invented prices or dates — everything is from official facts or marked TBD.
Short answer: Before Day 2-3, secure food (20+ types) and materials (4+ types). By the disaster moment, have 8 storage furniture, 24 potted plants (for Green Thumb), and defense parts for Triple Defense. Prioritize satiety 1200, items 180, and 8 furniture for Inventory Check.
Priority hoarding order (verified)
Follow this sequence every run — it matches the game's internal progression and achievement requirements. First, food: you need 20+ food types for the Well-Stocked Pantry achievement, but also because cooked meals restore Satiety & Morale post-disaster. Second, materials: 4+ types unlock Ready for Anything and let you reinforce doors/windows (day 2-3). Third, storage furniture: 8 pieces are required for Inventory Check (satiety 1200 + items 180 + 8 furniture). Fourth, seeds for farming (Green Thumb requires 24 potted plants, but seeds come before pots). Fifth, defense parts for Triple Defense (4 spikes + 4 electric nets + 4 chainsaws).
Why food variety matters more than quantity
Variety unlocks Well-Stocked Pantry and makes cooking easier later. You can buy food from 5 supply points (supermarkets, hardware stores, farmers' markets) during the 10-hour countdown. The game tracks 20+ food types — not total units. Same with materials: only 4+ types count for Ready for Anything. So hoard different items, not just duplicates.
Weight milestones: 5 kg, 25 kg, 50 kg
Stockpile weight matters for three achievements: Prepper (5 kg), Fine Haul (25 kg), Doomsday Tycoon (50 kg). These are cumulative — you don't lose progress when you use items. The table below shows verified thresholds from the official facts pool:
| Weight | Achievement | Notes |
|---|---|---|
| 5 kg | Prepper | Easy to reach with food + materials |
| 25 kg | Fine Haul | Need ~10+ food types + 4 materials + furniture |
| 50 kg | Doomsday Tycoon | Requires 8 furniture + 20 food types + lots of materials |
There's no penalty for heavy stockpiles — the game encourages hoarding. But storage caps apply: max satiety 1200, items 180, and 8 storage furniture (for Inventory Check). You can exceed 1200 satiety with specific items? The cap is 1200 from all food combined. Items cap at 180 total (including furniture).
Storage limits: what the game really caps
Three hard caps are known: 1200 satiety, 180 items, and 8 storage furniture. These are for the Inventory Check achievement. You can have more than 180 items in your Loot Spotter inventory, but the stockpile cap is 180. Furniture count includes shelves, cabinets, and the Tool Cabinet (80 slots, added 8/14). The 8/17 patch added category labels (18 types: Food, Fridge, Tools, Materials and more) to storage furniture titles, so you can label which shelf, closet or refrigerator holds what. If you hit caps, sell/donate surplus via drone trading (you get seeds from neighbors later).
What NOT to hoard (waste of weight and time)
Don't hoard money — you need to spend it all before disaster (see Penny Pincher: less than $50 at disaster). Don't hoard broken furniture (no use, takes space). Don't hoard unusable tools — only Reinforced Components, Tool Cabinet, Crowbar, Rat Trap, Brewing Barrel, Disinfectant Spray, Vase are confirmed. Don't hoard items the horde can steal — post-disaster, if your door/window breaks, raiders steal from your stockpile. Focus on reinforcing those (day 2-3) and using traps.
After disaster: meals, repairs, and drone trading
Post-disaster, you use your stockpile for two things: meals (cook 10 perfect dishes for A Good Meal, 30 for Perfectionism) and repairs (workbench repair path from day 6). Surplus food/materials can be traded via drones (50 drone runs for Aerial Scavenging) or given to neighbors who return seeds. The most valuable post-disaster items are seeds (for Green Thumb) and defense parts (spikes, electric nets, chainsaws). Start farming early — Green Thumb requires 24 potted plants, which means 24 pots + seeds.
August 19-21 Patch: New Recipes & Freezer Reminder
The 8/20 update added three new cookable dishes — Sauced Duck, Enoki Mushroom Beef, and Tomato Beef. The 8/21 update adds a reminder when you buy large frozen goods in pre-disaster shops that they need to be clicked and cut into smaller pieces after the disaster — factor that into your freezer-space and time planning.
First loop vs optimized loops
First loop: you learn the map (5 supply points), the 10-hour countdown, and your shelter. You'll likely get 15-18 food types, 3-4 materials, 4-5 furniture. Optimized loops: you know exactly which shops have food types, which have materials, and you can grab the Penny Pincher achievement (<50 money at disaster) and Minimal Budget (spend less than X — exact threshold TBD). For speedruns, focus on Steady and Stable (4 stats above 80) and Pulled Through (30 hordes).
Sample stockpile plan by day (verified schedule)
This table uses only in-game confirmed events — no exact prices, no first-horde dates (TBD). During the 10-hour countdown, visit all 5 supply points. By day 2-3, reinforce doors/windows (max for Iron Wall). By disaster day (when countdown ends), have 20+ food & 4+ materials. Here's a realistic plan:
| Timing | Action | Target |
|---|---|---|
| Hour 1-2 | Visit supermarket + farmers' market | 8-10 food types |
| Hour 3-4 | Hardware store + warehouse | 3-4 material types |
| Hour 5-6 | Return to shelter, place furniture | 4 storage furniture |
| Hour 7-8 | Buy seeds + pots (if found) | Seeds for 4-6 plants |
| Hour 9-10 | Reinforce doors/windows | Max reinforcement (Iron Wall) |
| Day 2-3 | Fix all doors/windows, craft traps | Defense parts for Triple Defense |
| Day 6+ | Workbench repair path | Repair tools, craft advanced items |
This plan gets you Well-Stocked Pantry, Ready for Anything, Inventory Check, and Iron Wall in one loop. Adjust if you get the Student character (added 8/14, has duplex shelter and farming/cooking bonuses).
Stockpile and endings (9 total)
Your stockpile influences which ending you unlock, but the official notes publish no exact thresholds — for each of the 9 endings and its trigger status, see the endings table on the Walkthrough page (most are officially TBD). What the achievements confirm about hoarding: Prepper (5+ kg stockpiled), Fine Haul (25+ kg), Doomsday Tycoon (50+ kg), Well-Stocked Pantry (20+ food types), Ready for Anything (4+ material types), Penny Pincher (under 50 money at the disaster), and Minimal Budget (reach an ending having spent under half your money). For the horde itself, Zero Breach (no door/window damage during the final horde) needs max reinforcement plus a working trap line — so hoard and fortify wisely.
Print-ready checklist
- 20+ food types (Well-Stocked Pantry)
- 4+ material types (Ready for Anything)
- 8 storage furniture (Inventory Check part 3)
- Satiety 1200 + 180 items (Inventory Check)
- 24 potted plants (Green Thumb)
- 4 spikes + 4 electric nets + 4 chainsaws (Triple Defense)
- All doors/windows maxed (Iron Wall)
- Less than $50 money at disaster (Penny Pincher)
- 5 supply points visited (Explore the Entire City)
- 30 trades via drones (Supplier) / 50 drone runs (Aerial Scavenging)
Data note: item prices are TBD
Exact item shop prices are unconfirmed (TBD). The official facts only state the base game price ($10.99, 15% off to $9.34 until Aug 26). For in-game prices, we have no verified numbers — always have a buffer of time and money. If you find a price in a screenshot, cross-check with two sources or mark "TBD".
Next step: Once your stockpile is ready, focus on safehouse management — Satiety, Morale, Stamina, Life above 80, cooking, farming, and power.
Learn safehouse management →